November 11, 2025
Table of Contents
- Prerequisites
- Instructions
- References
Purpose
This document demonstrates how to import a container image into the Enclave environment using a Linux Virtual Desktop. These instructions DO NOT apply to Enclave Windows Virtual Desktops.
Prerequisites
- You should have submitted an Access Request Form.
- Have access to an Enclave Linux Virtual Desktop.
- Have access to the Enclave Docker Registry.
- Have your container image saved as a tar archive.
Instructions
Step 1 - Save container images to a tar archive
In order to bring a container image to the Enclave, it must be saved as a tar archive so it can be easily transferred.
| Save |
| docker save busybox > busybox.tar |
Step 2 - Transfer container image to your Enclave desktop
This KB article explains the process
Step 3 - Import container image
Once transferred to your Enclave Desktop (VDI), import it like so.
| Import |
| cat docker_image.tar | docker import - <container_name>:<version> |
See Docker Docs - docker import
Step 4 - Log in to registry using your company credentials
Sign in to Execute this command from VDI
| Log in |
| docker login repo.analyticsenclave.org |
Step 5 - Tag container image
Replace container <image_id> and <image_name> accordingly.
| Tag |
| docker tag <image_id> repo.analyticsenclave.org/docker-local/<image_name>:<image_tag> |
<image_tag> can be "latest" or a version number such as "v1" etc.
See Docker Docs - docker image tag
Step 6 - Push container image to registry
This step uploads the image from your VDI to the Enclave container registry.
| Push |
| docker push repo.analyticsenclave.org/docker-local/<image_name>:latest |
Notice the registry host and repository under which container image will reside.
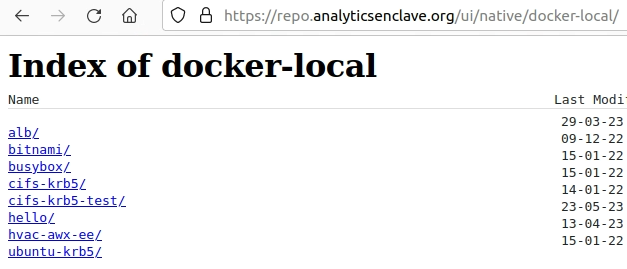
Step 6 - Validate upload was successful
Browse repository to validate your container image was uploaded successfully.
https://repo.analyticsenclave.org/ui/native/docker-local/

References
