Posted on
Updated on
April 13, 2026
There are several ways to connect to COVID-19 databases managed by the Digital Research Operations team when using the Enclave Windows Virtual Desktop.
This document describes: (1) How to connect to the COVID-19 databases via the SQL Server Management Studio (SSMS) and (2) How to access the COVID-19 Detailed Data Files i.e. data derived from the COVID19_Mart tables.
Prerequisites
- Access your workspace in the Enclave as outlined in the article Get Started With The Analytics Enclave
Connecting to the COVID-19 Databases via the Microsoft SQL Server Management Studio (SSMS)
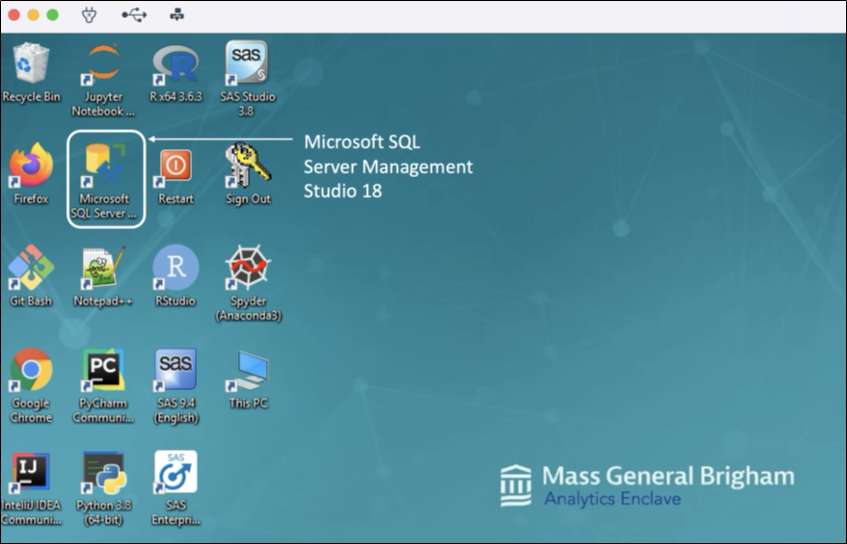
- Open Microsoft SQL Server Management Studio 18 from the desktop shortcut or through the start menu (example using MacOS).
- When the application opens, you will be prompted to connect to the server. The following entries should be used:
- For server type, select Database Engine (usually the default option)
- For server name, enter the name of your SQL Server instance i.e. enclave-mssql01 or mssql01.analyticsenclave.org for COVID-19 SQL databases
- Double-check the 3 entries and click on Connect. This will connect you to the database server using your MGB credentials.

- To navigate to the COVID-19 databases, expand Databases by clicking the plus icon or by double-clicking the text. This will display a list of databases - select database you are authorized to access.
- You have access to 2 earlier versions of the respective databases. The most current version is, for example, COVID19_Mart (without a date extension).

- Find the database (COVID-19, COVID-19 Vaccine Registry, COVID Vaccine Self Reported Symptoms, or project-specific database ) you wish to work with and expand the folder.
-
- There are two main folders of interest under the Databases are Tables and Views. Open the Tables folder to query the data.

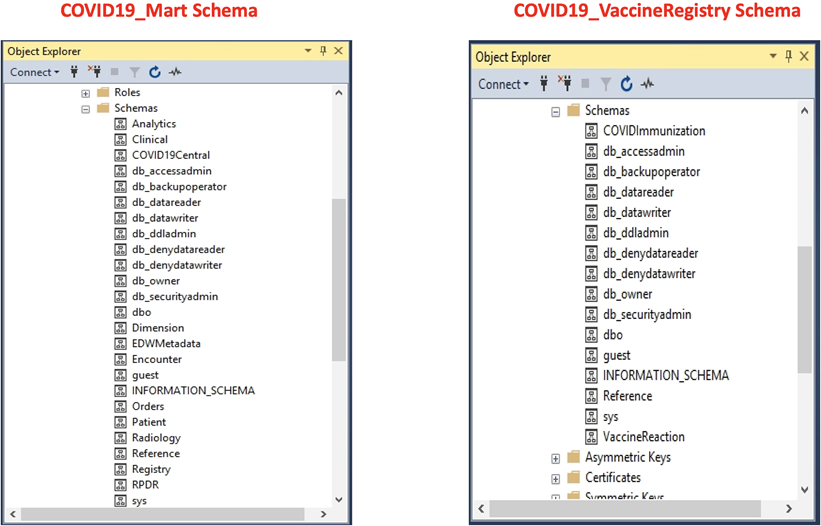
- Database Schema: The screenshots below depict the master database (COVID-19 data mart and COVID-19 Vaccine Registry) schema.
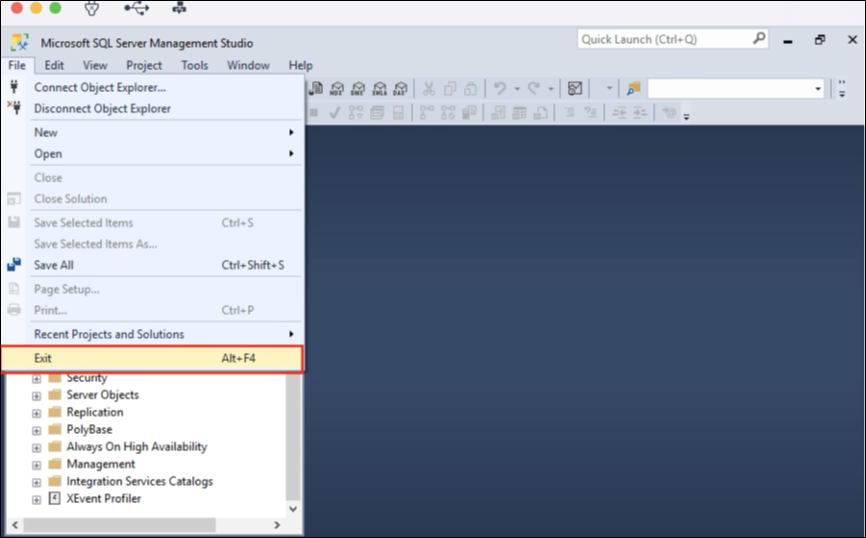
Remember to Sign Out on completion of your work.
Connecting to the COVID-19 Detailed Data Files
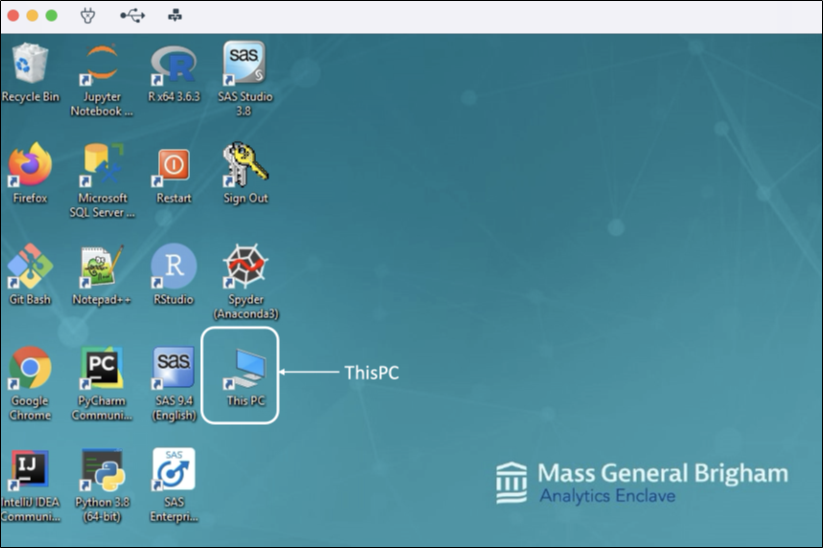
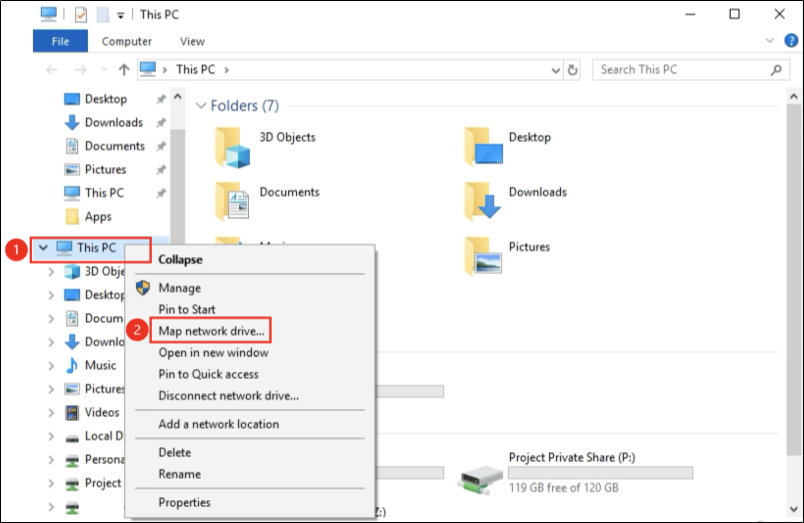
- Locate This PC shortcut icon on the desktop.
- Right-click on This PC
- From the drop-down list, select Map network drive
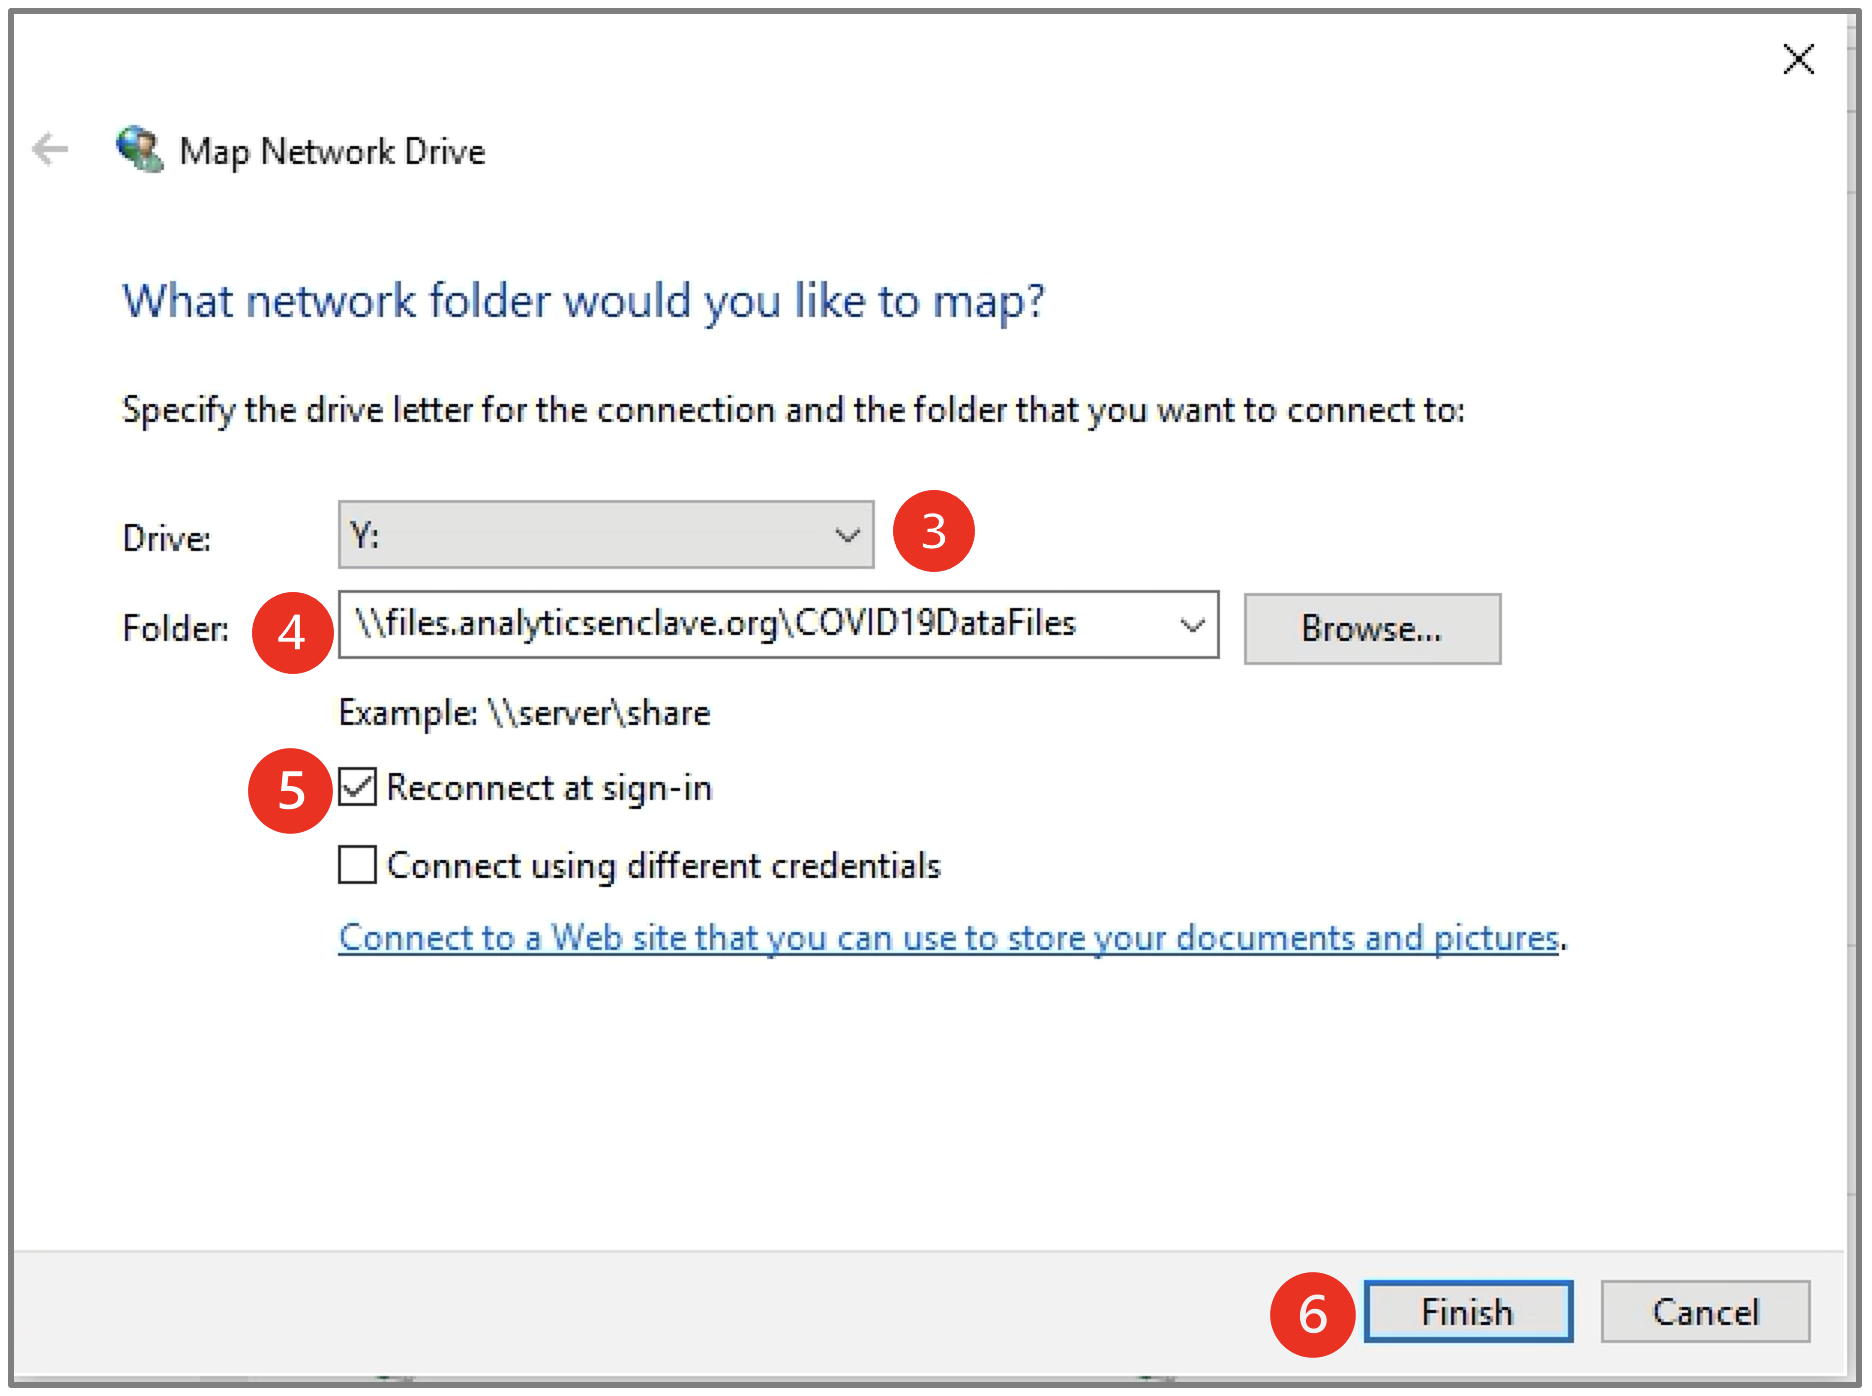
- In the resulting dialogue box, you will see a drop-down select menu from which to choose a drive letter. Choose a Drive letter that you want to use to access the COVID-19 Detailed Data Files (Y: is selected in this example).
- Type in the file path to the folder: \\files.analyticsenclave.org\COVID19DataFiles
- Use two forward slashes "\\", followed by the server name "files. analyticsenclave.org" and then another forward slash "\", followed by the folder name).
- To select the folder, click Browse...
- Check the box Reconnect at sign-in so that the shared file will reconnect the shared drive whenever you log on to the Enclave Virtual Desktop.
- Click on the Finish button to access the contents of the folder.
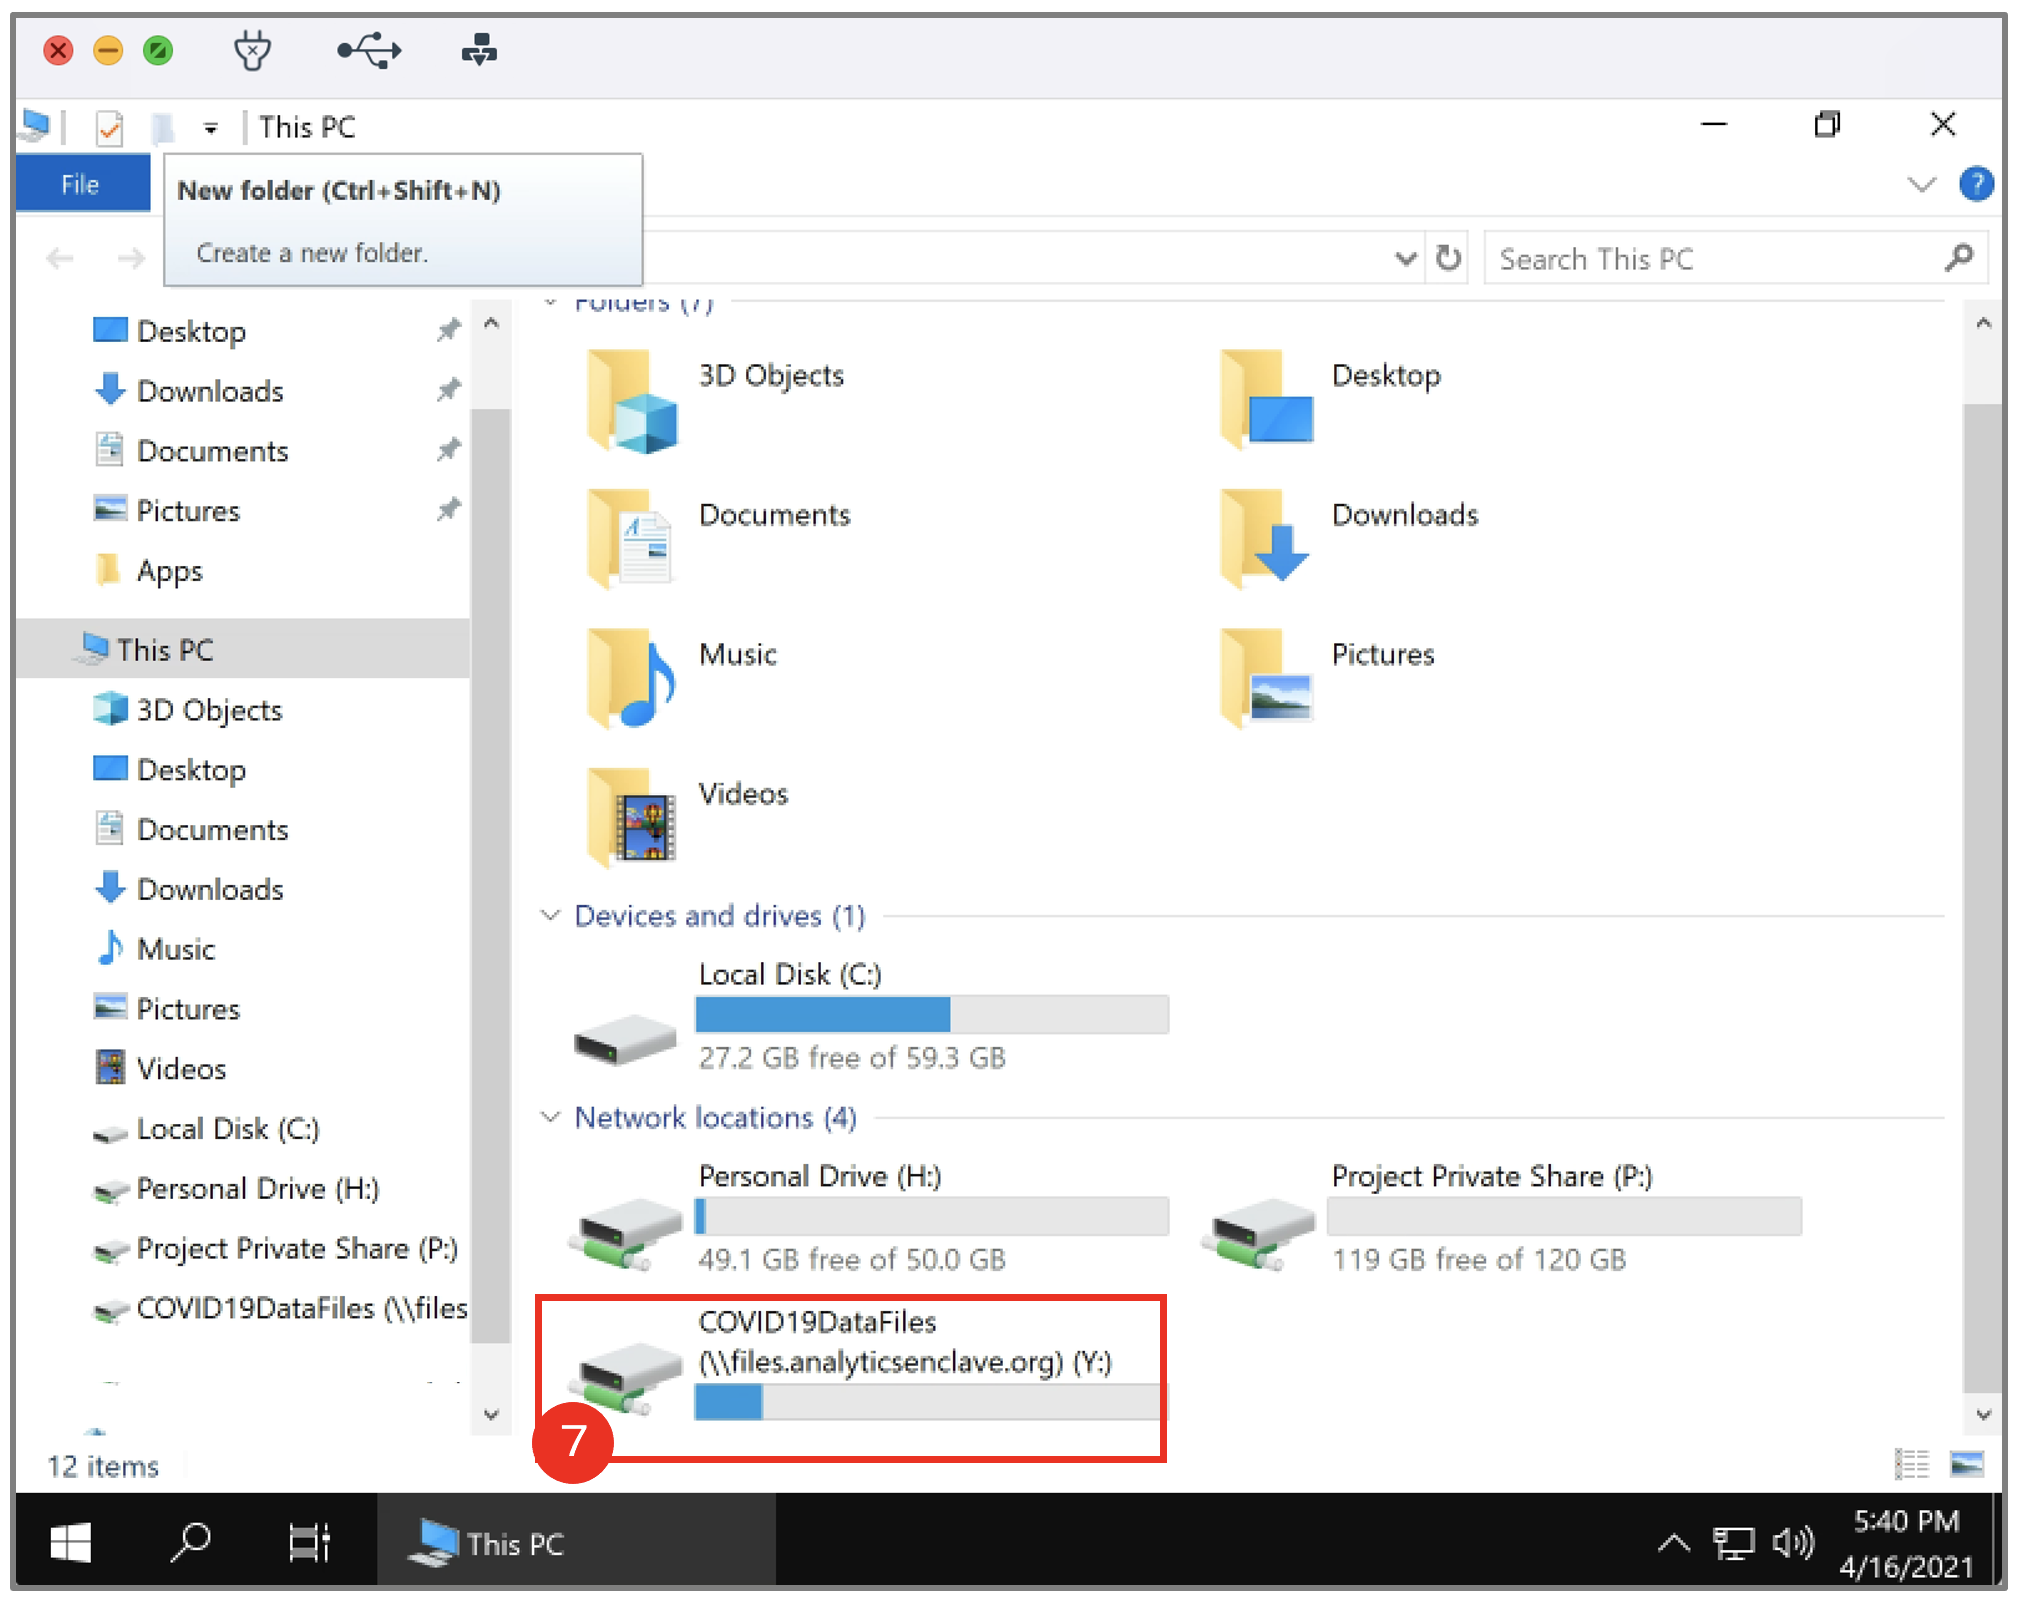
- Upon successful and complete mapping, you will see the COVID19DataFiles folder, as shown below. The mapped drive will be a location in File Explorer and all your programs. The files are in READ ONLY format.
Additional Resources
QuickStart: Connect and query a SQL Server instance using SQL Server Management Studio (SSMS) | Microsoft Doc
Introduction to SQL | Codefinity
If further assistance is needed, contact the Digital Service Desk to have a ticket opened with the Enclave Platform - MGB team.
Related Articles
Get Started with Analytics Enclave