Posted on
Updated on
September 25, 2026
The Staff section of the Animals module presents a list of Study Staff and Non-study Staff members. It lets users add new Staff members to the protocol or remove existing Staff during initial protocol creation, an Amendment, a Staff Update, or a Triennial Review request.
Steps
Prerequisite: A protocol must be open and a transaction must have been created.
To add new internal Study Staff:
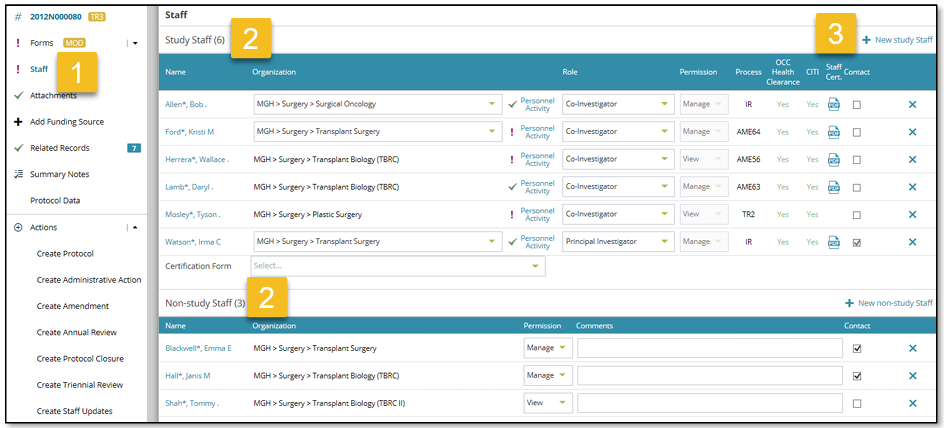
- Click the Staff section on the left navigation panel; note that it gets unlocked when an Amendment or Triennial Review or Staff Updates request is created
- The Staff page consists of two grids, one for listing the Study Staff members and the other for Non-study Staff members.
- You can add new study staff members by clicking on the + New Study Staff link in the top right corner of the Study Staff grid.
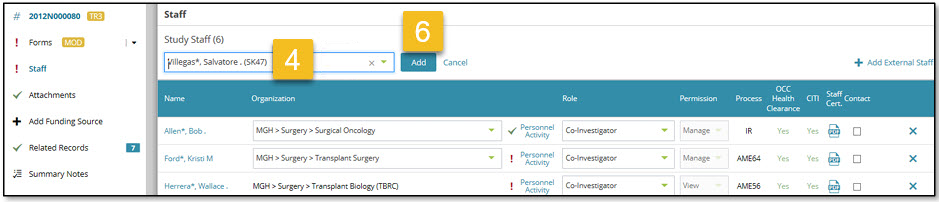
- Upon clicking the + New Study Staff link, a type-ahead drop-down box is displayed
- You can enter the staff name or username in the search field, search for the staff from the drop-down list, and select the person you would like to add.
- Click Add to add the selected person to your registration; you can see a confirmation message in green to the right corner of the page.
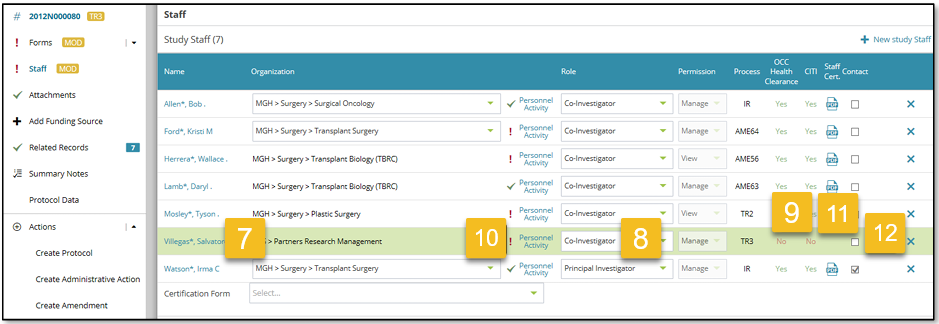
- The selected person is successfully added to the Staff page.
- You can select the role for the newly added staff member from the drop-down field for the new record that has been created
- The OCC Health Clearance and CITI training statuses are displayed on the grid for all the study staff members
- Click on the Personnel Activities link next to the Organization, and an internal window opens where you can select the appropriate Procedures and Qualifications for the corresponding Study Staff
- After the Staff Certification is complete, a PDF copy is available under the Staff Cert column for the added staff member
- To add the staff member as a contact to receive notifications from Insight regarding actions due/completed on the protocol, select the checkbox in the Contact column
Required AALAS Training
Before submission, Study Staff must complete required training. Additional training may be required after addition to the protocol, and before using animals/accessing facilities.
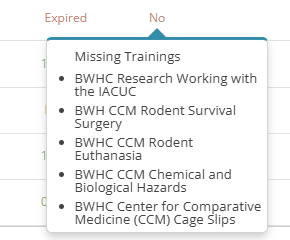
If “No” is indicated next to a Study Staff on the table, click on “No” to display the list of missing trainings required. Refer to the IACUC Required Training Checklist for assistance creating an AALAS account, if needed.
| NOTE: AALAS trainings must be completed before submission of a study staff update. Failure to complete required training will prevent processing and approval of study staff onto a protocol. |
To add external study staff:
- click on the + New Study Staff link. Note that a link + Add External Staff appears at the top right corner of the study staff grid
- Click + Add External Staff
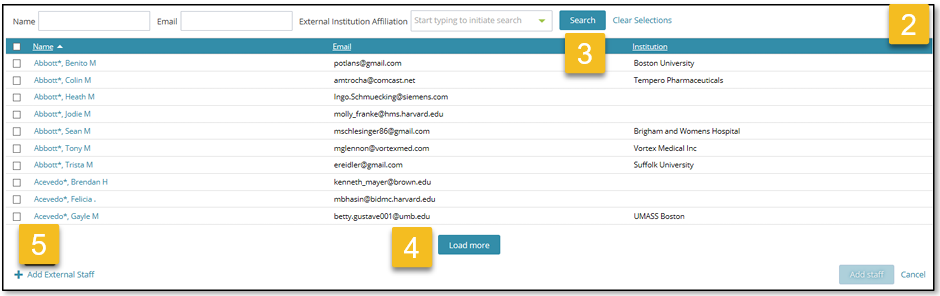
- An internal window pops-up where you can search for an external staff.
- Clicking on Search button presents a list of external staff members
- Clicking on Load more button and scrolling down loads more external staff members
- You can add a new person by clicking on + Add External Staff link at the bottom left corner of the window
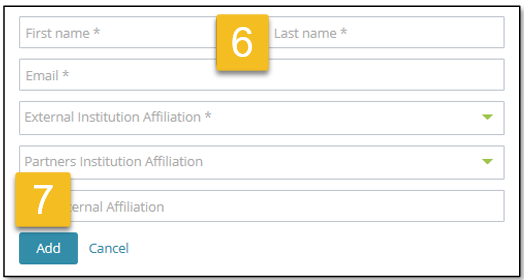
- Another internal window pops up where you can enter the name, email, institution details of the external staff being added
- Enter all required fields and click Add button. The external person also gets added to the grid similar to step 10.

Add new non-study staff members
- Click on + New non-study Staff link on the top right corner of the Non-study Staff grid.
- You can select the organization and permission values from the drop-down fields

To remove a staff member:
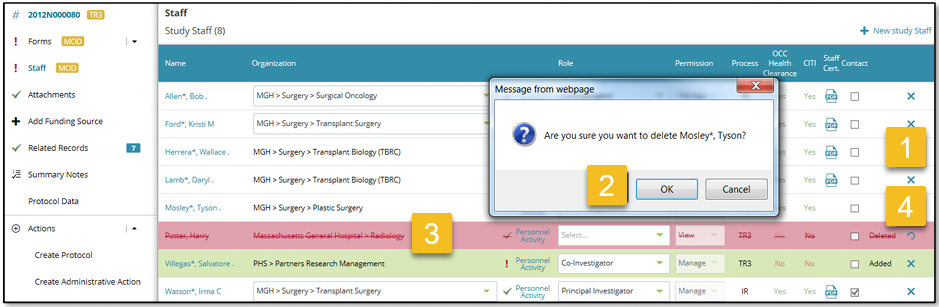
- Click on the X icon at the end of the staff record
- Click OK to confirm staff deletion
- After the staff deletion, you can see the deleted staff member striked off and in red text
- You can undo the staff deletion by clicking on the Undo button
- Staff deletion can be successfully restored after clicking Undo, you can find a confirmation message to the top right corner of the page.