Posted on
Updated on
February 5, 2026
These instructions are written for individuals sending an email from the List Manager (Lyris) web interface.
Requirements
- Website address: https://researchlistadmin.partners.org or https://phslyris2.partners.org
- Login User Name: your email address
- Password:
- Complete the Mailing List System Request Form if you are creating a new list
- Password can also be reset: https://researchlistadmin.partners.org/emailpassword.tml
Note: One alternative to using the web interface and these instructions is to send an email message to a list from your email client. Compose a message 'To:' @email. Depending on how your list permissions are configured, the person composing the message from an email client needs to have permission to send to this list. If you need to grant someone access, see How to add Administrators to your Lyris Mailing List.
Instructions
- Navigate to https://researchlistadmin.partners.org in your web browser.
- If you have administrative access to more than one list, check that you are in the correct list.
- You can see what list you are in by looking at the top right corner of your window.
- If you are not in the correct list, click the name of the list you are in and you’ll be brought to the Change List in Utilities.
- On the left hand navigation bar, click on Content
- Complete the Essentials:
- Content Name: Assign a unique name, only for admin to see
- Description: Can repeat above, only for admin to see
- From: Check that this is correct. By default, this is the email address of the message author. Note that means that replies to this message will go to the author.
- You can use a group email address from which to address the messages. Example: "Partners Research IS & Computing" <@email>
- If you don't have one, you can request one from the Exchange Team by opening a ticket with the IS Service Desk.
- You can designate a 'Reply To' address so that the message comes 'From' one email address and any replies go to another.
- Utilities > List Settings
- Email Submitted Content > Header Rewrites
- Reply To: Designate what email address should receive any responses by putting the email address in brackets in this line. Example: "Partners Research IS & Computing" <@email>
- You can use a group email address from which to address the messages. Example: "Partners Research IS & Computing" <@email>
- To: Do not change!
- Subject: This is what the user will see.
- DO NOT hit Create Mailing after filling out the essentials, move on to the HTML Message Tab next to essentials.

- Complete HTML Message
- Add your content to the message one of these ways:
- Copying/pasting from word
- Enter the text directly
- Note: If you are not using a Template, you may use the Import File button if you have an .html file that you obtain from another program
- Here are some suggestions incase you need to clean up the formatting once your content is added:
- Paragraph format = Normal
- Font – Arial (a standard font is suggested as not all fonts show across devices and operating systems)
- Titles/headers: select Font size 'medium' and select Bold
- Text in body of message: select Font size 'small' and deselect Bold
- Double check for changes that need to be made in spacing, especially when pasting from word.
- If you do not want skipped spaces between lines, use Shift+Enter
- Add your content to the message one of these ways:
- Complete Text Message
- Use the HTML to text button. Users can choose whether to receive message as HTML or text; therefore, the message should be created in both formats.
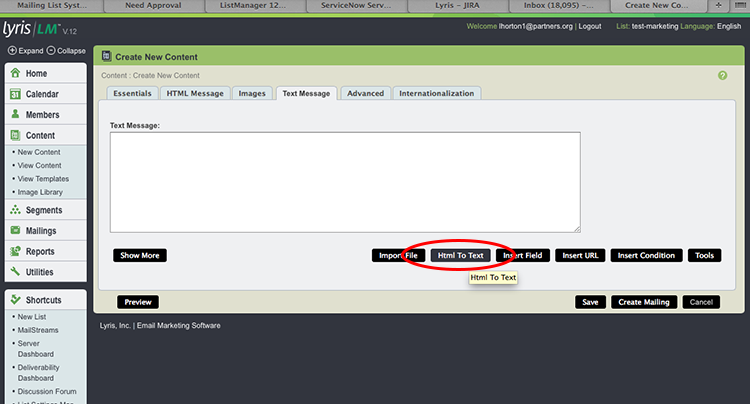
- Use the HTML to text button. Users can choose whether to receive message as HTML or text; therefore, the message should be created in both formats.
- Once you’ve finished with creating both the HTML and Text messages, click Create Mailing (bottom right corner)
- If you would like to send to a subset of your list, see the article, How To Send an Email to a List Segment in Lyris
- Optional: Schedule the date/time for sending this message.
- You can do this later as well, it is recommended to wait until the message is final before scheduling
- Go back to the Message tab to finish editing your email. Double-check spacing, indents, fonts as some things shift while creating mailing. *You will notice that both the HTML & Text boxes are now open. Some things to keep in mind:
- If you edit something in the HTML box, you must edit in the text box
- If you edit something in the Text box, you must edit in the HTML box
- Once you feel the mailing is set to send, click Save and Test
- In the “Send Test To” make sure your email is listed. Use a comma to separate email addresses if sending the test email to multiple recipients.
- Click OK
- You will receive a Test Email in your Inbox
- Do not worry that the email appears to have been sent to a specific person. It is truly a test and did not go to that user.
- Please make sure to read through for spelling & grammatical errors
- Please make sure to click on all hyperlinks to be sure they are working
-
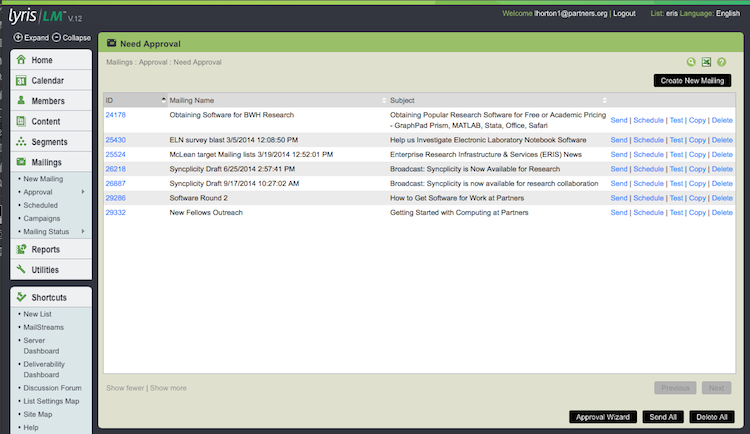
- Need Approval - Lyris will then open the following screen where you will be able to edit the mailing if you find errors as well as choose to send the mailing:
- If you need to edit the email, please click on the number (ID) on the left hand side corresponding to your email.
- Remember: If you edit something in the HTML box, you must edit in the Text box as well.
- Re-test every-time you edit something.
- If you need to edit the email and you’ve been logged out of Lyris, find the email by navigating to:
- Mailings > Approval > Need Approval > Select the number (ID)
- Mailings > Approval > Need Approval > Select the number (ID)
- If you need to edit the email, please click on the number (ID) on the left hand side corresponding to your email.
- Need Approval - Lyris will then open the following screen where you will be able to edit the mailing if you find errors as well as choose to send the mailing:
- Send - If the mailing is ready to be sent, click on the Send link on the right hand side corresponding with your email.
- You will be asked if you are sure that you want to send, click yes and your mailing will be sent.
- You may also schedule the email to be sent at a specific date/time, click Schedule link on the right hand side corresponding to your email.
- List Maintenance from the contact list:
- To remove a recipient from the contact list: Member > View Member > Find Member > Search for address and click GO > Delete
- To add members to your contact list: Member > Add Member
- To add many members to your list, please see the KBase article, How to Import a List in Lyris.
Online Manual: http://lunar.lyris.com/help/lm_help//12.0/index.html
If you have any additional tips, questions, updates or feedback about this document, email @email.