HOWTO: Configure and Connect to VPN on a Mac

Requirements:

  • macOS 12, 13, or 14. If your Mac is running an OS older than 12 you are out of support, at risk and out of compliance with Partners policy. Please contact the Service Desk for assistance with an upgrade.
  • VPN Access. If you need VPN Access, review KB0018524 to request VPN Access.
  • PEAS Enrollment. Verify you are enrolled in PEAS. You will have the Self Service application installed in your Applications folder. Otherwise review KB0034657 to enroll in PEAS.
  • SecureConnector. SecureConnector is required for VPN. The installer is available in Self Service. See KB0030738 for steps to ensure your Mac is in compliance. 
  • A device registered for phone verification in MyProfile. Contact the Service Desk if you need assistance with MyProfile.partners.org
  • Ensure you are not connected to PHSWIFI3 to connect to VPN.


HOW TO: Configure and Connect to VPN on a Mac

  1. Launch Self Service from your Applications Folder.


  2. Login with your Partners credentials.

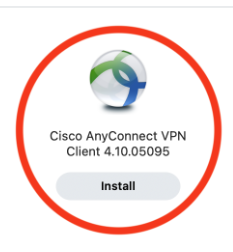
  3. Click Install under the Cisco AnyConnect VPN Client to install, or to upgrade if you have a prior version. Note the install screen will tell you the version hosted in Self Service.


  4. Click install. When finished the icon will show "reinstall". This is normal, do not click reinstall.


  5. When AnyConnect is finished installing, you will see notifications of Background Items added- this is necessary, do not turn this off in System Settings. You will also get a notification to Allow alerts for AnyConnect, you can choose whichever option makes the most sense for you.                
                 
     
  6. You will also receive pop-ups about System Extensions. In the smaller window (It may be covered up by the larger window) click Open System Settings
    .
  7. In System Settings, scroll down until you see the Security section. Click the Allow button to enable the Cisco AnyConnect Socket Filter to be allowed to load. This is necessary to use VPN.
  8. When complete, one more pop-up window will appear, click Allow. This is also necessary for VPN to work.
  9. The pop-up that initially appeared will change when complete; click Dismiss
  10. Launch Cisco AnyConnect from the Cisco folder within your Applications folder.

  11. In the connection box enter: pvc.partners.org/saml and click Connect.

  12. Authenticate with your Partners credentials and click Sign In for browser based Identity Management via Okta.

  13. Choose the method you would like to Authenticate with- SMS Authenticated code or Okta Verify
  14. If you chose SMS Authentication, Click Send Code to receive a SMS Authentication Code.

  15. Enter your code and click Verify.

  16. If you chose Okta Verify, click Send Push, and approve with the Okta Verify app
  17. Safari will pop up a window that says you have successfully authenticated, you may close this window to continue.

  18. Congratulations! You have successfully setup and configured (and connected to) VPN!


Related Articles:

HOWTO: Map a Network Drive on MacOS

HOWTO: Install the Citrix Workspace App on Macintosh

HOWTO: Configure and Connect to VPN on a Mac with Software Token Authentication

HOWTO: Uninstall the Cisco VPN Anyconnect Client for Mac OSX

HOWTO: Uninstall the Cisco VPN Client for Mac OS X via Command Line


Go to KB0033989 in the IS Service Desk